How to scan slides
Return to Main Menu
- Make sure batch slide scanner is connected to the computer; power scanner on. Make sure nothing is sitting in front of the slide scanner, as the slide arm needs room to extend.
- Wait for scanner to calibrate, this takes two minutes. The scanner arm will extend and retract several times. Wait for the led light on front case to stop blinking green.
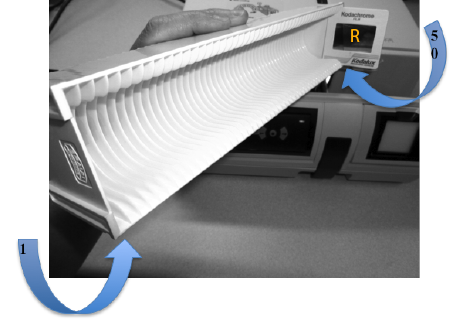
- Position the white slide tray with the numbers 1- 50 facing up, with position #1 farthest from you, as seen in the picture below. Insert slides as pictured below (Image 1), starting with position #1. Note the “R” on the slide in Image 1. This is the correct orientation of slide placement in the white tray to ensure that your slides scan in correctly, face-up.
- Make a note of which positions the slides are in (e.g., 1-5), according the numbering on the white slide tray. In a later step, you will indicate this particular range of slides to be scanned.
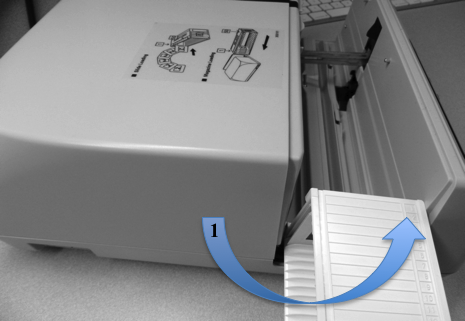
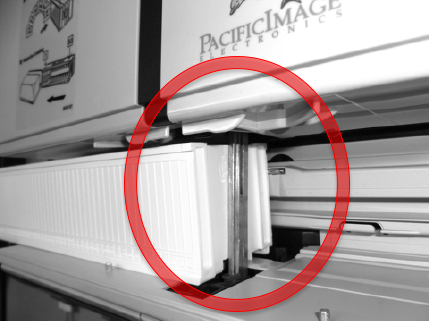
- Insert loaded white slide tray into batch scanner as pictured below (Image 2). The largest opening of the white slide tray will face the inside of the scanner. Gently press the tray toward the middle of the scanner until the edge of white tray is flush/touching metal slide arm (Image 3).
- On the computer that the scanner is connected to, open the scanning software, “CyberViewX” (Image 4). Search for “CyberView X” in the spotlight (click magnifying glass icon in upper right corner) and open software.

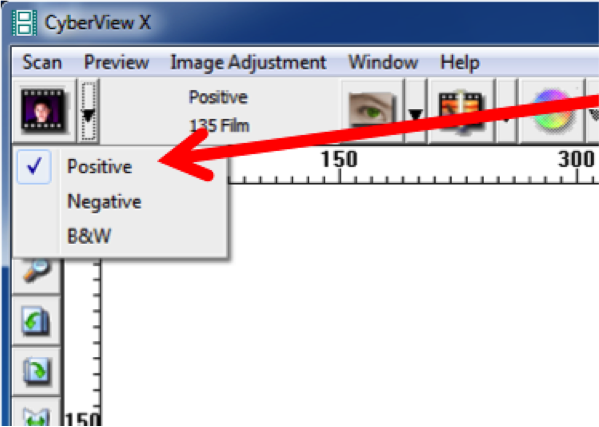
- Choose the appropriate scan results – for normal coloring, select “Positive” (Image 5).
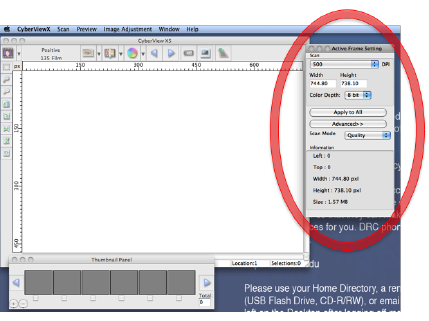
- Next, adjust the DPI (dots per inch), size, and quality in the Active Frame Setting pop-up window (Image 6). This menu should have automatically appeared after the pervious step of selecting a “Positive” scan.
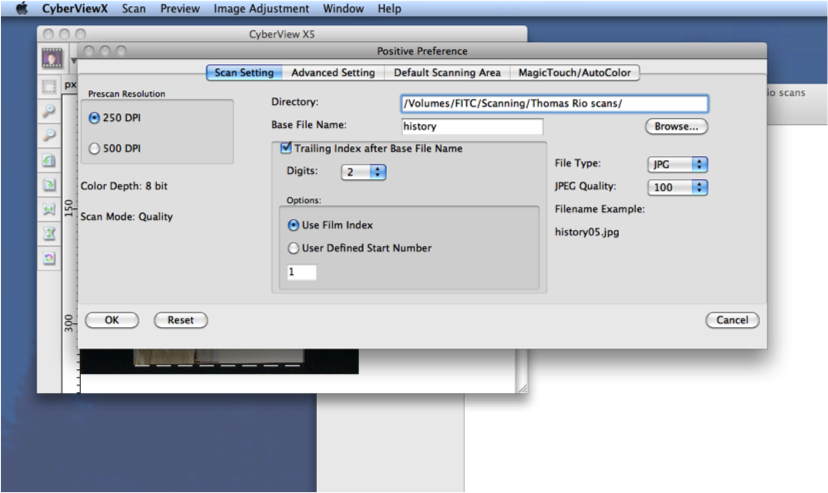
- The default directory that scanned slide images are saved to is “user/labuser/image1.tif” (double click the hard drive icon in the upper right of the desktop, then navigate to “labuser” in the left menu). The directory can be customized by selecting “Scan” from the top menu, then select “Preferences” and click on “Positive” (Image 7).
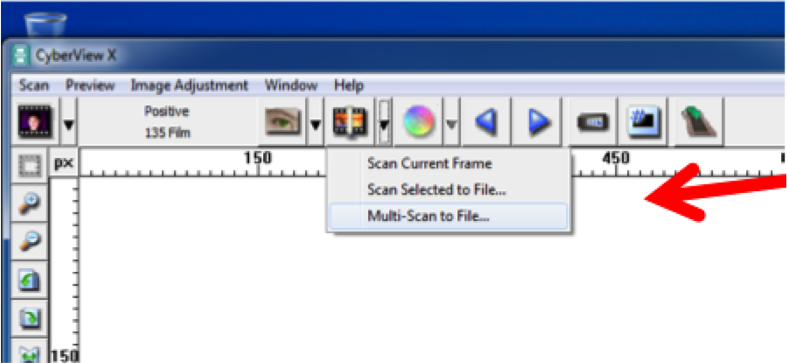
- Next, from the main top horizontal menu, choose “Scan” and then click “Multi-Scan to File…” (Image 8.)
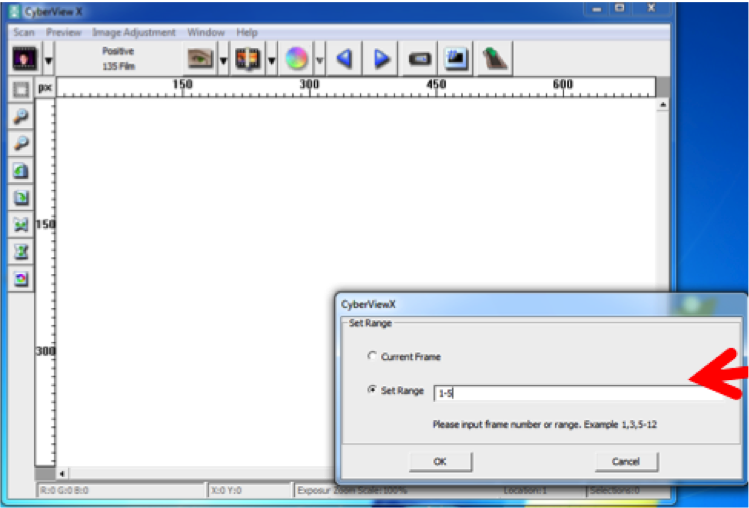
- When the “Set Range” menu appears, indicate which slides you want to scan (Image 9) by selecting “Set Range.” Refer to the numbers on the side of the white slide tray, and specify the range of slide placements (e.g., 1-5 or 1,2). Once you press “Ok” the slides will begin the scanning process.
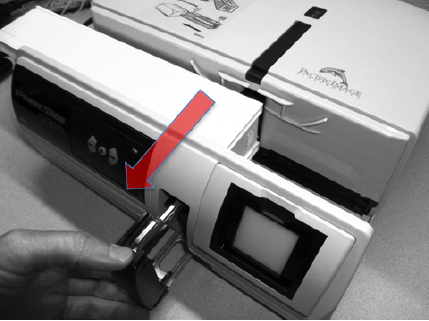
- When the slides have completing the scanning process, gently extend the slide arm, removing it from the tray slide; this will release the white slide tray. Pull the slide arm all the way out, toward you (Image 10).
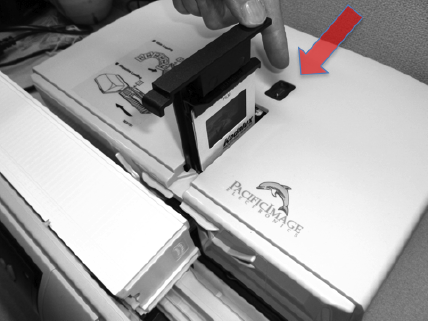
With the slide arm extended, you should be able to gently slide or lift the white slide tray out of the scanner. Next, manually release the last scanned slide from the slide scanner by pressing the green slide release button on the top of the scanner (Image 11).
- Power scanner off, and navigate to your directory to access slides. If you experience any technical issues, please email lt-tech@ucsc.edu. Happy Scanning! Learning Technologies http://its.ucsc.edu/about/its-units/learntech/services.html

UC Santa Cruz, 1156 High Street, Santa Cruz, Ca 95064
©2024 Regents of the University of California. All Rights Reserved.