How to Print
Wēpa enables you to print from anywhere on or off campus and even from your smartphone or tablet. Documents can be uploaded in a number of convenient, easy-to-use methods from campus and personal computers, tablets, and smartphones and then released on campus print kiosks. Discover the many ways of how to print with Wēpa below.
 |
Personal Computer
Follow these six steps to print at a kiosk from your computer.
- Download and install the Wēpa print driver:
- Open your document and from the Print menu, choose a printer:
- Wēpa BW for black and white prints
- Wēpa BW Two-Sided for double-sided black and white prints
- Wēpa Color for color prints
- Wēpa Color Two-Sided for double-sided color prints
- Please note: UCSC Printing kiosks only print on letter size paper (8.5”x11”). Please format your document to this size before printing
- Visit any kiosk on campus and touch the screen to start
- Swipe your UCSC ID card, enter a release code, or log in with your CruzID login to download your print jobs from the cloud
- Select the file to print, the print options, and your payment method
- Collect your print job
- Log out
|
 |
USB Drive
Follow these five steps to print at a kiosk with a USB drive.
- Save your document to a USB drive and visit a kiosk on campus
- Insert your USB flash drive into the kiosk USB port (if your files do not display, reinsert your USB)
- Note: Do not remove your USB drive until your files have finished printing
- Select the file(s) to print, the print options, and your payment method
- Collect your print job
- Log out
|
 |
Computer Lab
Follow these nine steps to print from any computer on campus.
- Visit a campus computer lab
- Open your document and from the Print menu, choose a print option:
- Wēpa-BW for black and white prints
- Wēpa-Color for color prints
- UCSC's Printing kiosks only print on letter size paper (8.5”x11”). Please format your document to this size before printing
- Click Proceed to send your print job to the cloud
- Enter your CruzID login(@ucsc.edu) and Gold password when prompted for authentication
- Visit any kiosk on campus and touch the screen to start
- Swipe your UCSC ID card, enter a release code, or log in with your CruzID login to download your print jobs from the cloud
- Select the file(s) to print, the print options, and your payment method
- Collect your print job
- Log out
|
 |
Mobile Device
The Wēpa print app can be used to print from Apple and Android smartphones and tablets.
Apple iOS

- Download the Wēpa print app onto your Apple device
- Open the document you want to print and select the Open icon
- Select Open in Wēpa Print
- Log in with your UCSC login(@ucsc.edu) and Gold password when prompted by the Wēpa Print app
- Select the print options and number of copies to print
- Tap Send to Wēpa to upload your document to the cloud
- You will receive confirmation that your file has been uploaded
- Visit any kiosk on campus and touch the screen to start
- Swipe your UCSC ID card, enter a release code, or log in with your CruzID login to download your print jobs from the cloud
- Select the file to print and your payment method
- Collect your print job
- Logout
Android

- Download the Wēpa Print app from the Google Play store.
- Open the Wēpa print app and login using your UCSC login(@ucsc.edu) and Gold password
- Select File to print
- Navigate to the folder storing your file and open the file to print
- Select the print options and number of copies to print
- Tap Send to Wēpa, a checkmark next to your file name will confirm the file is ready to print
- Visit any kiosk on campus and touch the screen to start
- Swipe your UCSC ID card, enter a release code, or log in with your CruzID login to download your print jobs from the cloud
- Select the file to print and your payment method
- Collect your print job
- Log out
|
 |
Email to Print
Follow these nine steps to print at a kiosk from your computer.
- Log in to your UCSC email
- Attach a Microsoft Office (Word, Excel, or PowerPoint) or PDF document(s)
- UCSC's Printing kiosks only print on letter size paper (8.5”x11”). Please format your document to this size before printing.
- Specify any print options on the first line of the email body:
- Color for color prints. Default is black and white.
- Duplex for double-sided prints. Default is single-sided.
- Send email to print@wepanow.com. Wepa will place your files in your account or a Guest account.
- Note: If you send the email from a non-UCSC email account, it will be placed in a Guest account
- You will receive an email reply when your files are ready for release. Visit any kiosk on campus and touch the screen to start.
- Swipe your UCSC ID card, enter a release code, or log in with your CruzID login to download your print jobs from the cloud
- Select the file to print and your payment method
- Collect your print job
- Log out
|
 |
Cloud Accounts
Follow these nine steps to print at a kiosk with a cloud service account
- Visit a campus kiosk
- Swipe your UCSC ID card
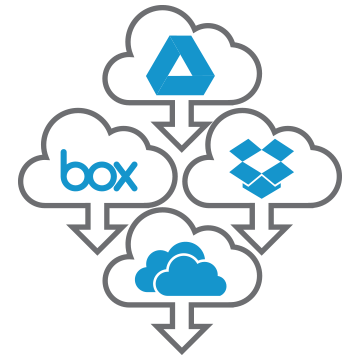
- Tap on the icon of the cloud service that you will be using (Google Drive, Office365, Dropbox, or Box)
- Log in to your cloud service account
- Allow Wēpa Printing to access the drive account
- Select the file(s) you wish to print
- Select the file(s) to print, the print options, and your payment method
- Collect your print job
- Log out
|
 |
Guest Accounts
Visitors and guests of the UC Santa Cruz may use UCSC's printing kiosks by creating a Wēpa account. (Note: Wēpa accounts have been created for all UCSC students, faculty, and staff to access UCSC's printing services in the campus labs and libraries. Use your UCSC Login (@ucsc.edu) and Gold password to log in and manage your account.)
Create a wepa account as a visitor or guest
- Register using the online form on Wēpa's website
- In the "Select School" drop-down list, select A Guest User and click the "Register" tab
- Fill out the information requested and submit the form
- You will receive confirmation that your registration is complete
- Print from a USB drive and pay with a credit/debit card. A $0.40 transaction fee will apply to all credit/debit card purchases
Deposit funds to your wepa account
- Log in to your Wēpa account and click Deposit Funds
- Complete the Billing Address and Credit Card Details sections on the online form
- Select the amount of money you would like to deposit.
- Note: there is a $5.00 minimum deposit required
Print with your Wepa account
- Upload your files to your Wēpa account from a computer lab workstation, your personal computer, or your mobile device
- Visit any kiosk on campus and follow the screen prompts to release your print job
|


